This screen allows you to access the Ledger Masterfiles to either view, add, delete or change ledger accounts within the system. This screen is used for all ledger account maintenance.
When AM-WIN is first installed some General Ledger Accounts are automatically set up. These accounts include control accounts such as the Debtor, Creditor and Stock control account as well as other ledgers such as Cash and Bank accounts. Some of these Accounts are used by AM-WIN when processing stock sales, purchases and assets accounts. Therefore these accounts should not be changed. It is preferable to add new accounts rather than rename and/or modify existing accounts.
Note: If a ledger account was previously used for another purpose and you change the name of this account for a different purpose, the transactions previously used against that account will remain in the system which can be confusing if the transactions have substantially different meanings.
AM-Win is separated into 9 account ranges. Account ranges between 1000 - 3999 are used for Balance Sheet items, whereas accounts between 4000 - 9999 are used for trading accounts. Each section of the General Ledger Accounts contains the ability to create up to 999 Accounts. See General Ledger Setup for more information.
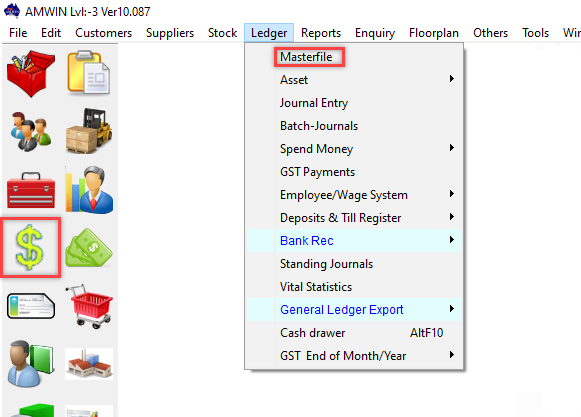
This screen can be accessed from the Ledger Masterfile icon on the toolbar, or from the Ledger > Masterfile menu.
(Click on the regions outlined in red on the screenshot below to view more information about a specific section)

There are a number of ways to find a ledger account within the Masterfile screen. Depending on how you have configured the system, the default when the screen opens can either be to search by Code or ledger Name. This option can be altered from the System & Company Details > Supplier / Ledger tab > "Default to Name Search for Ledgers". If the option is unticked, the screen will default to search by ledger Code. If you wish to search by name, you can then click on the Name tab and then enter the name of the ledger to locate it. If you know the code, then type the code under the Code tab and the system will find the code which is the closest match to what you have entered.
In some cases, you may not be familiar with the code, or the name may have been entered in such a way that makes it difficult to find. In this instance, you can also click on the Find button which will allow you to search for a ledger by the name of the ledger account where only a partial match is required. This means you can enter a word or combination of letters that appears anywhere in the name of the ledger to locate the ledger account.
Once the required ledger has been located, you can make changes to the ledger as required and then click on the Save button to save the changes. Refer to Inserting a New Ledger later in this page for detailed information on each of the fields on the screen.
If you wish to create a new ledger account, the most important thing to be aware of is which account range the ledger should be added to. Refer to General Ledger Setup for more information.
Click on the Insert button to add a new ledger account. If you search for a ledger by the Code and are unable to find it, the system will automatically insert the code you entered to create the new ledger. Otherwise, the ledger code field will be blank, allowing you to enter the 4 digit code you wish to use.
After entering the required ledger code, click the OK button to return to the main screen. You are then able to enter the details of the ledger code as follows:
This button will open a screen allowing you to fill in additional details against the bank account. The screen will allow you to enter the Account Name, BSB Number and Account Number. If you are going to use this bank account for Supplier EFT Payments and create an ABA file, you will need to also fill in the EFT Code and APCA Code relating to the bank account. The EFT Code can be entered based on the options shown on the right hand side of the screen. The APCA Code is automatically entered based on which bank you choose. If the option is not available, you will need to contact the bank and manually enter these details.
You can record a Start Balance, which would be the opening balance of the bank account depending on when it was last reconciled. The Start Balance is always the opening balance at the beginning of a particular financial year. See Bank Rec Maintenance for more information.
Enter the GST Type from the drop-down menu. This will be the default GST type used for transactions to the ledger account. In most cases, you can override this at the time the transaction is processed as some accounts may include both GST and non-GST transactions within the same account.
The GST options available are as follows:
o GST GST applies to the transaction
o No GST GST free transaction for example – overseas suppliers
o Acquisition The purchase is for a Non-Current Asset and GST applies
o N/A GST is not applicable for example on journal transactions
See GST Types for more information.
If you have multiple locations and have set up the Multi Locations function, you can assign a specific location to a ledger account by clicking the Location button and selecting the location to be assigned. By selecting a location it will restrict access to the ledger account so that it can only be accessed either by Head Office or the selected location.
Enter the description of the ledger account. This description is used when invoicing or purchasing directly into the ledger. After selecting the ledger within a transaction you can then manually override the description for a specific transaction without permanently changing the ledger name. When naming a ledger, you should first consider a naming standard to make it easier to find the ledger by name at a later time.
This field is automatically filled based on the general ledger code range that it is in as per the General Ledger Setup
This allows you to enter your accountants equivalent code so that when printing reports that you want to provide to your accountant, their account numbers appear in front of each ledger code so that it is easier and quicker for your accountant to recognise what goes where in the ledgers. You can also use this field to consolidate certain ledgers. Eg. you may wish to consolidate all your labour accounts into a group "Labour" by using that code for all associated labour accounts in the Alternate code field. You can then print various reports such as a Profit and Loss report or Trial Balance using this field to consolidate the accounts. This field is also used in the General Ledger Export function to generate an export of transactions to another accounting system your accountant uses.
This field is automatically filled and will show the date that the general ledger account was created.
This field is only available for cash accounts (usually between 1010 - 1019) to enter a float balance that is retained when the funds are transferred to the bank.
The Status will default to "Active" which will allow transactions to be entered against the general ledger account. If you set the Status to "Suspended", the system will block transactions from being entered against this account.
This option is used to allocate a specific department ID for a particular ledger account. When the transactions are exported using the General Ledger Export function the system will include the Cost Centre ID in the export. Each location can be allocated a Cost Centre ID from the Multi Location Masterfile.
Accounts between 4000 and 9999 represent income and expense accounts. Ledgers starting with even numbers such as 4, 6 and 8 are used as income accounts. Ledgers starting with odd numbers such as 5, 7 and 9 are used for expense accounts.
(Click on the regions outlined in red on the screenshot below to view more information about a specific section)

This field indicates that the expense or income account is a fuel account. Any expenses allocated to a fuel account will then be collected and allocated to the BAS Statement to calculate fuel credits that may be available to you. You can also set up a part number in the Stock Masterfiles which has a similar option to label the stock item as a "Fuel" item. When fuel items are purchased, the system will prompt you to enter the use of the fuel, the number of litres purchased and the fuel type.
This field allows you to enter a unit label which is shown on an invoice if the item is used to charge to a customer. The label examples include "Each", "Pair", "Litre" or however else the item is sold.
You can setup as many as 99 different cost centres or departments in AM-Win. You can then get a profit and loss report for each of the departments as if they were separate businesses or sections of the business. Departments can be set up through the Department Masterfile option.
This option allows a **Profit & Loss report to be produced for separate departments. If your business has more than one profit centre then you can setup: department 1 as the income and expense department for one area and department 2 as the income and expense for another area and then department 3 and so on.
Department “0” means the expense or revenue items are common to all departments. They will be attributed to the bottom line (income or expenses) for the entire business as a whole.
If this item is used to charge on an invoice to a customer, the Cost rate is applied to the selected ledger item. This is used to calculate the cost per unit of the item. When the item is sold, the system allows you to view the cost of the item and will then calculate the profit. This information can be viewed from a Job Invoice, Customer Order, **POS invoice and other invoicing processes. This cost is used for reporting purposes only, and does not affect any posting of transactions to the General Ledger.
If this item is used to charge on an invoice to a customer, the Charge rate is applied to the selected ledger item. This could be a standard labour rate or other rate depending on the nature of the ledger code.
The system records the last date and time anything was changed on a ledger code. It also records the operator that made the changes. If you wish to view what was changed, this information is available from the Log File.
When an item from a sale is added to the Bucket, the ledger code is generally an income code. When the item is then purchased from the supplier, you would generally use an expense code to process the purchase. The Bucket Ledger allows you to record the expense code which corresponds to the income code, so that when the income item is sold and the item is added to the bucket, the Bucket Ledger is automatically inserted into the Bucket rather than the sales ledger. E.g. for an income ledger of 6030 you would have a Bucket Ledger of 7030 so that any items sold via the 6030 ledger would be purchased under the 7030 ledger.
Because Balance Sheet items roll over the closing balance at the end of each financial year to a carried forward balance of the new financial year, the system allows you to view the carried forward balance that was carried forward from the previous year.
This field contains the value of transactions that have been processed against the account from the beginning of the financial year until now, and is automatically updated as transactions are processed.
This field contains the balance of transactions that have been processed against the account from the beginning of the financial year until now, and is automatically updated as transactions are processed. In the case of Balance Sheet items, the Acct Balance will be equal to the Carried Forward balance + YTD Balance.
Note: If you wish to record opening balances for a particular account when first using the system, you should process opening balances as a Journal Entry.
The system allows you to import a budget for all income and expense codes for each individual month of the financial year. Especially in cases where your income and expenses are very seasonal due to peak times of the year as well as slow times, you may wish to record budgets against individual months for each ledger code. Firstly, you should create an Excel file in the format of Column A being the Ledger Code and then Columns B through to M being the months from July to June. Each row in the spreadsheet will indicate a different GL code relating to the budget figures.
Once the Excel file has been created and saved you can then import the budget by using the Import Budget button. After clicking the button, the Import Budget window will open, allowing you to select the Excel file to be used which will then display details of the file that has been created. You can then click on the OK button to import the budget. Once the budget has been imported you can produce either a !!Current Budget Statement or !!Forecast Budget Statement, allowing you to view your budget position.
Click on the Save button to save any changes made to a ledger item or to save details of a new item that has been inserted
If you have started to insert a new ledger code and wish to clear the details and start again, you can do this by clicking on the Clear button.
You can only delete a Ledger Account if the account has a zero balance and has not had any transaction processed against it. This is because if an account has been used in a previous period and you wish to report on that period, the report will be out of balance for any account which was deleted if you are able to do this.
To delete an account which has not been used, highlight the account to be deleted and click on the Delete button.
This button allows you to import a budget that has been created using an excel spreadsheet. Click on the Import Budget button which will open a new window allowing you to select the excel file to import from. Click on the Import button to select the excel file, once the file has been selected the system will give you a preview of the data to be imported. It is important to make sure the correct format is used for the excel file so the data is imported correctly. The budget can only be imported based on the financial year selected at the top of the budget area. If you are happy with the preview of the budget figures, then click on the OK button to import the budget. You can then manually change figures if required or import a corrected file if changes need to be made.
The format of the excel file needs to be the same as shown on the screen with column A having the ledger code, column B being July, column C August etc. You should not use a header row for the excel file.